NetCat Integration
Step 1. Download
Note that the correct operation of the plug-in can only be guaranteed with absolute URL. To get started, download the module from this link.
Step 2. Configuring a module
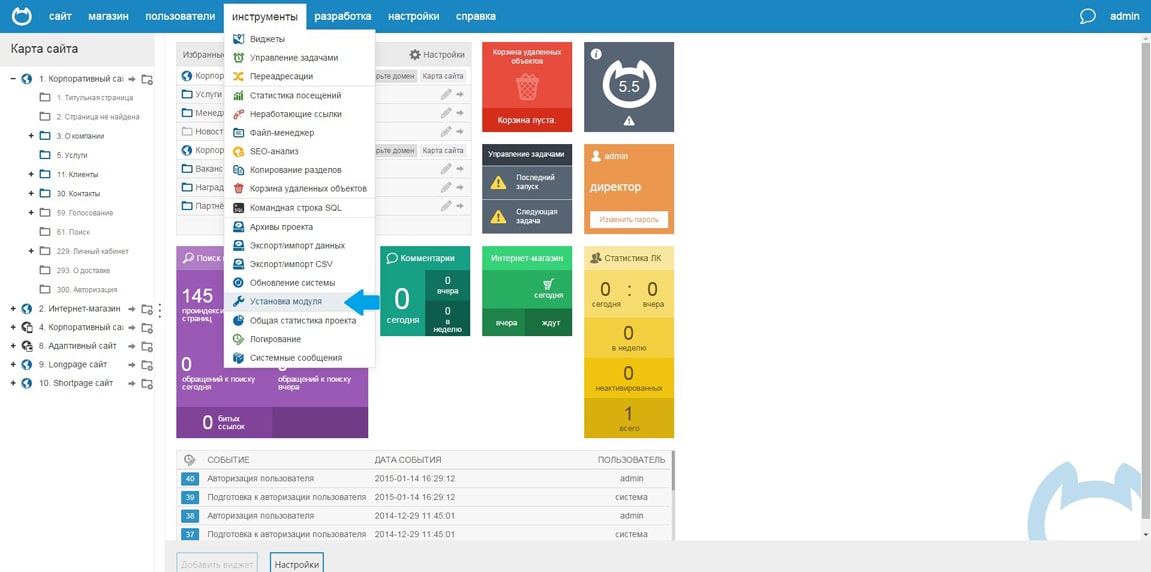
In the “Tools” menu, select “Set module”.
Step 3. Configuring a module
Locate the module on your PC and install it.
Step 4. Install a module
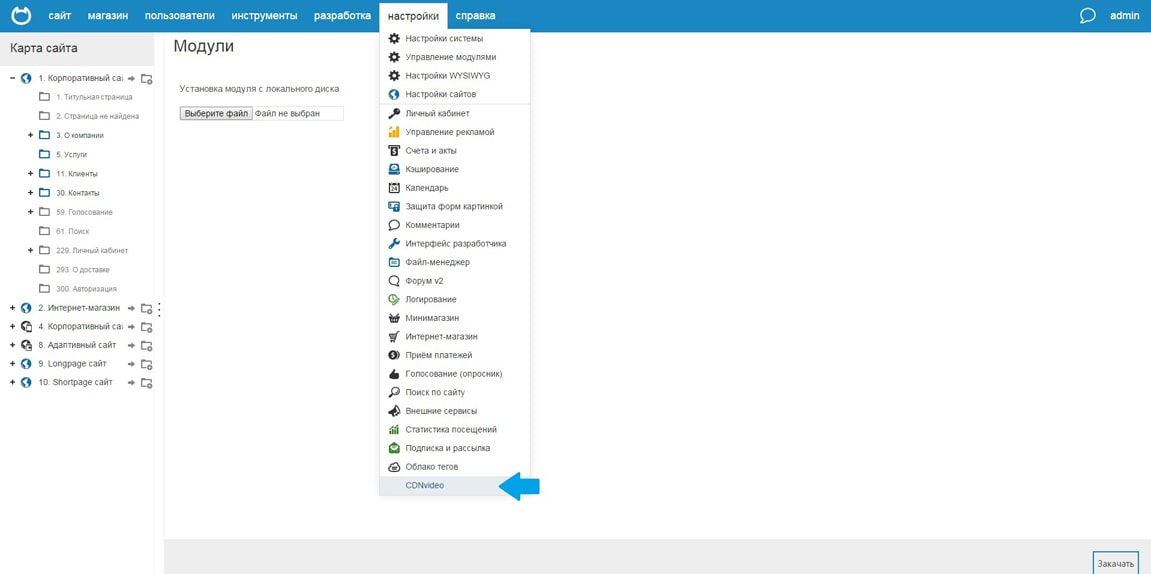
Proceed to the “Settings” menu and select the installed module.
Step 5. Caching small static files
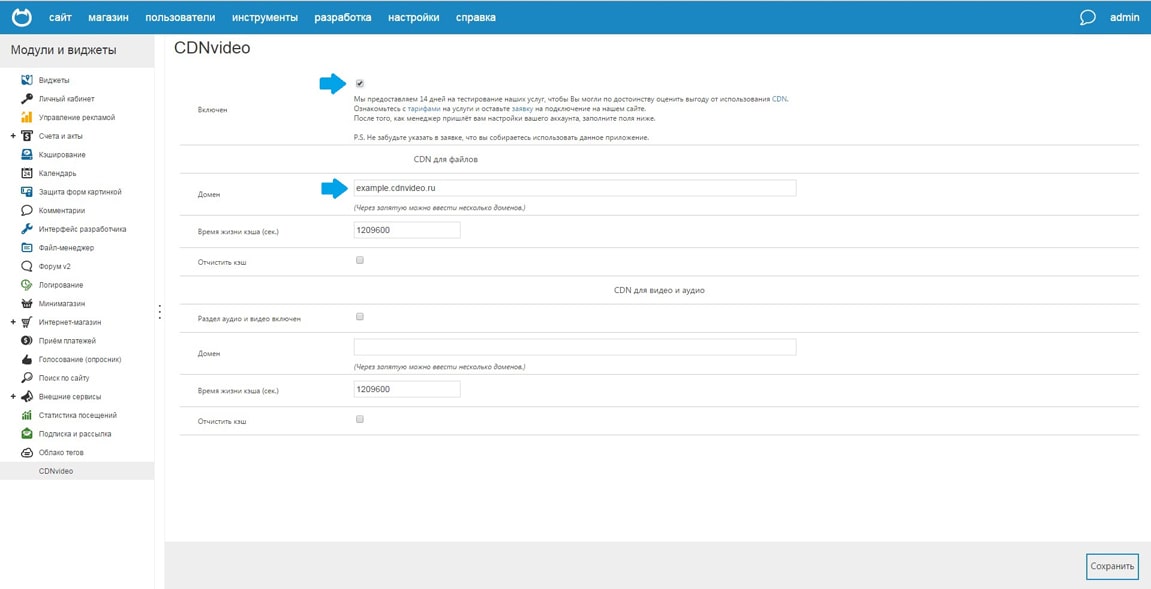
- Section “for the CDN files” is intended to cache files, the volume of each of which does not exceed 1 MB.
Usually these are files with the following extensions:
- jpg
- png
- css
- js
- gif
- Enter the domain name to CDNvideo network (taken from the letter received from your account manager) and set the caching time (set in seconds, 2 weeks displayed by default).
- Click on the “Save” button.
- Congratulations! You are connected to the CDN.
- You can always clear the cache for a given section. Note that the cache is cleared only for selected domain / domain.
Step 6 (Optional). Caching heavy static files
- To complete this section need a separate domain for CDNvideo network. Contact your manager or technical support, to address this issue.
-
Section “the CDN for video and audio” is designed to cache files, the amount of which exceeds 1 MB. As a rule, these are files with the following extensions:
- mp3
- mp4
- ogg
- flv
-
Turn section.
- Enter the domain name to CDNvideo network.
- Click the “Save” button.
- You can clear the cache for a given section anytime. Note that the cache can be cleared only for selected domain.
Step 7 (For experienced users).
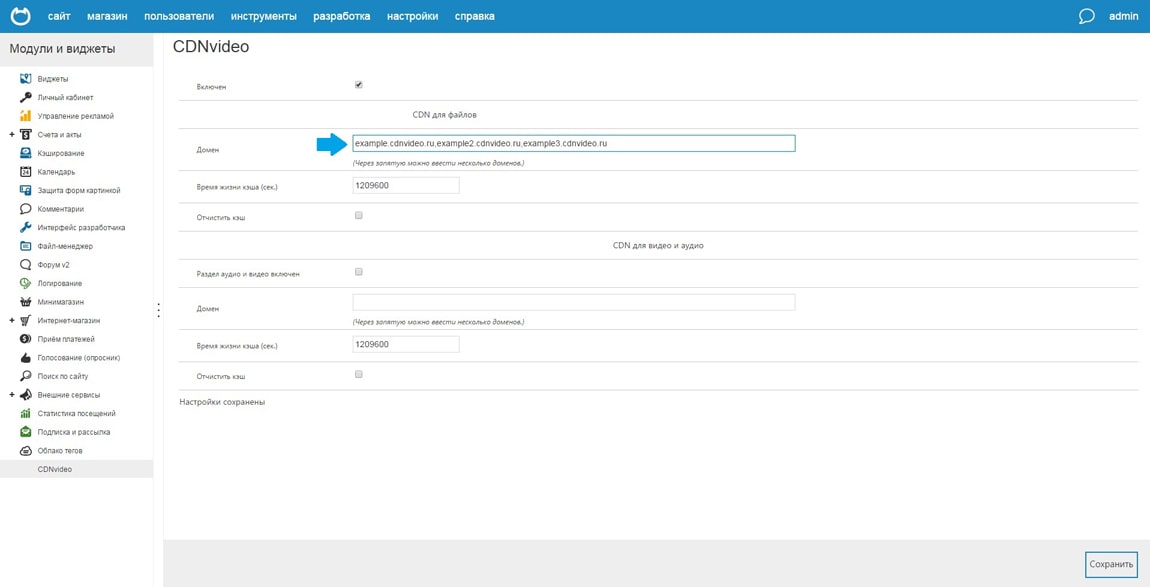
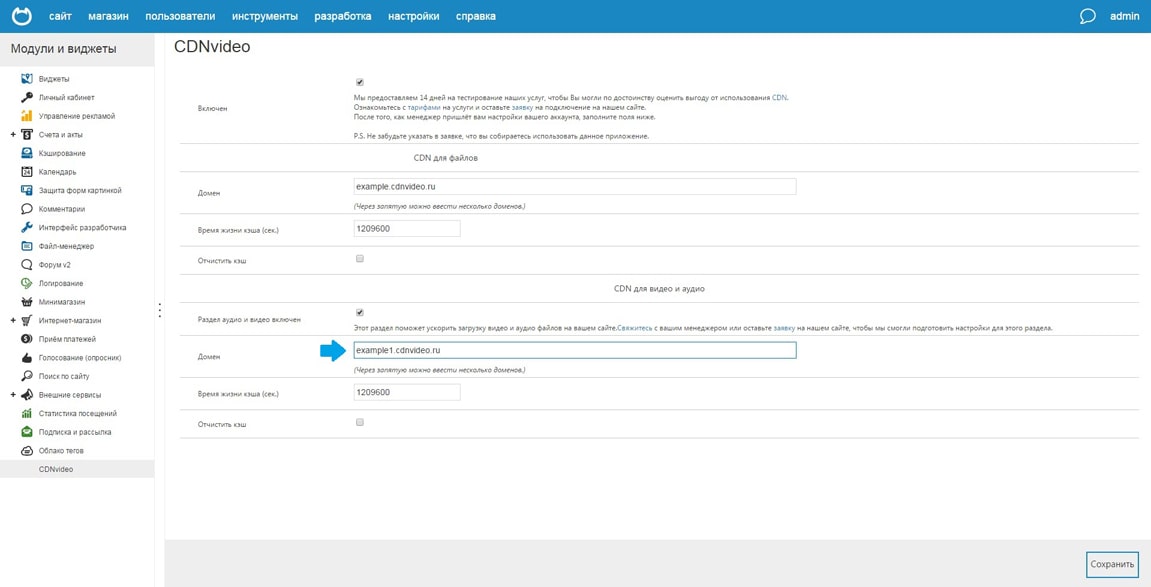
Browsers limit the number of concurrent downloads from a single domain. To work around this limitation, you can set up multiple CNAME and thus ensure a faster loading of your website. To activate this option you need:
- Contact your manager or our technical support and customized to your account multiple CNAME.
- Specify in the application all the selected domains, separated by commas, as shown in the figure.
- Do not forget to save your changes.
