Joomla! Integration
Warning!
Before proceeding to the implementation of these instructions, keep a backup copy of your website and database (as a precaution).
Step 1. Install the extension CDN for Joomla!
- Download extension.
- Log in to Joomla admin section.
- Click on the tab «Extensions» (extension) in the top navigation bar and go to the «Extension Manager» section. You should be automatically moved to the «Install section» settings section if it does not, click on the link «Install» upstairs.
- Find the section «Upload Package File», click the radio button «Choose File» File and locate the extension CDN for Joomla !, which you’ve already downloaded.
- Click on the button «Upload & Install» to download and install extensions on your web-site.
Step 2. Setting the CDN extension for Joomla!
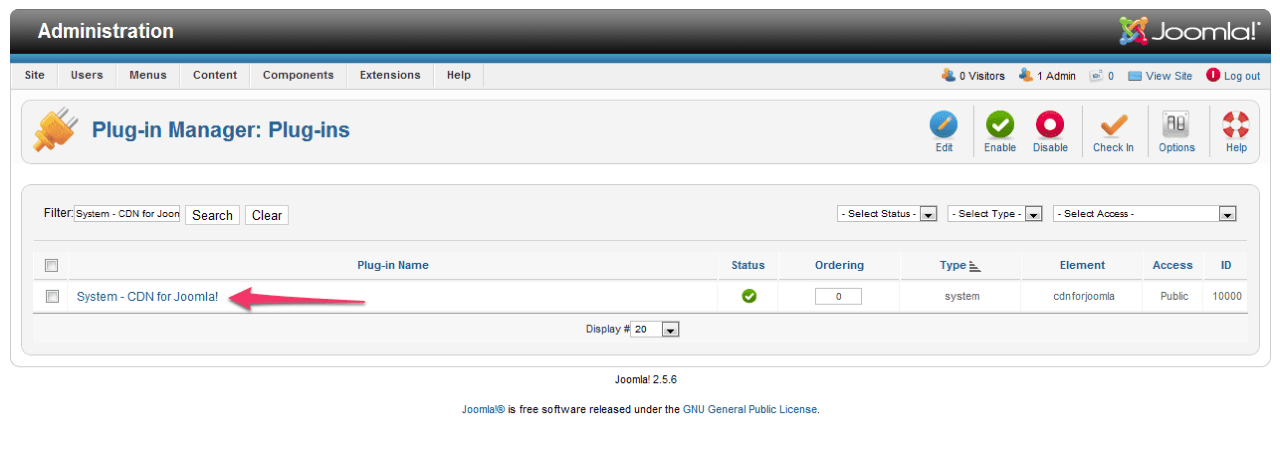
Click on «Extensions» tab in the top navigation bar and then click «Plugin Manager».
Find CDN plugin for Joomla! – It will be displayed as «System - CDN for Joomla!», and click on it to edit the settings.

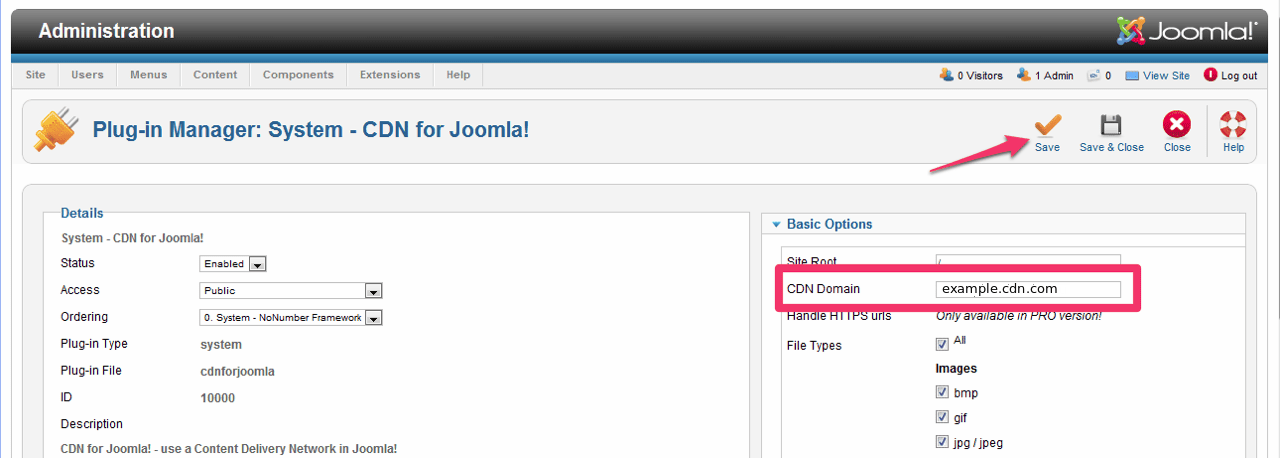
On the Settings page, in the section «Basic options» basic options enter your domain to CDNvideo network (this record can be found in the letter to the settings that you sent our staff). Click on the button «Save», to save the settings.
