Bitrix Integration
Step 1. Authorization
INFO!
Note that the correct operation of the plug-in can only be guaranteed with absolute links.
- Sign in with your username and password in the administrative part of 1C-Bitrix.
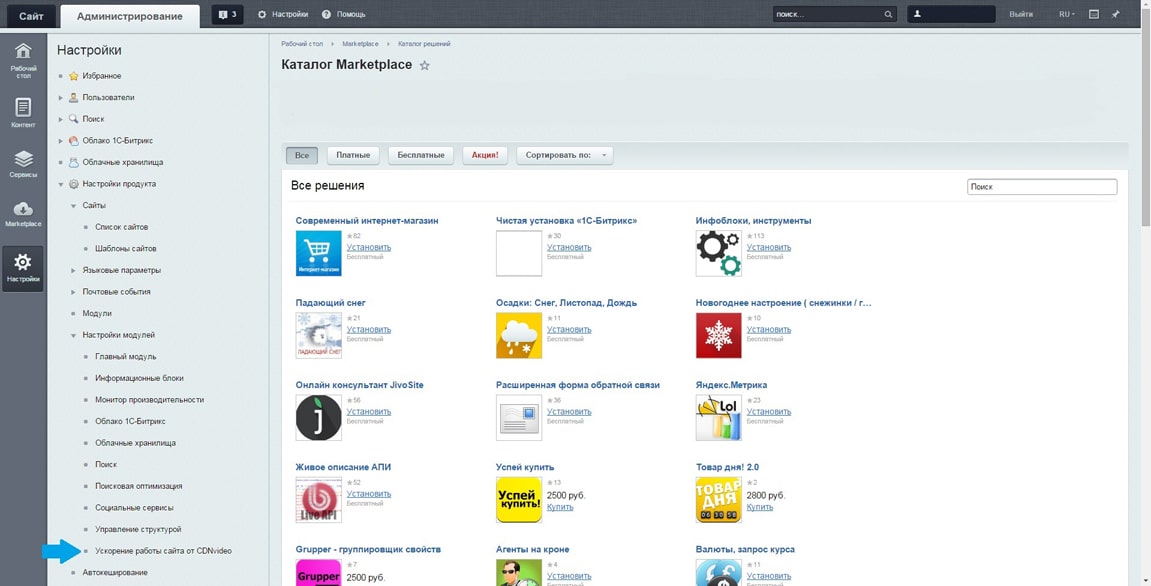
- In the left side menu, select "Marketplace" and get the application on demand "CDNvideo".
- Install the application.
Step 2. Configuring a module
Follow in the "Settings" menu and select the installed application "Accelerating site from CDNvideo".

Step 3. Configuring a module
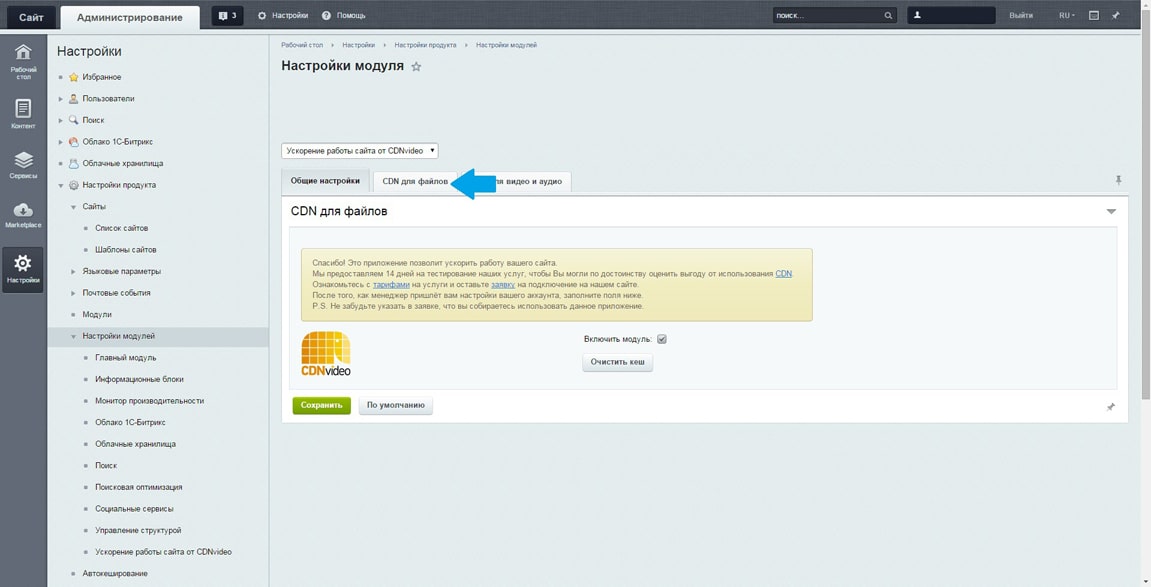
Turn on the unit and select the tab “CDN for files". Saving the changes is not needed for this stage.

Step 4. Caching small static files
-
Section "CDN for files" is intended to cache files which don’t exceed 1 MB. Usually, these are files with the following extensions:
- jpg
- png
- css
- js
- gif
-
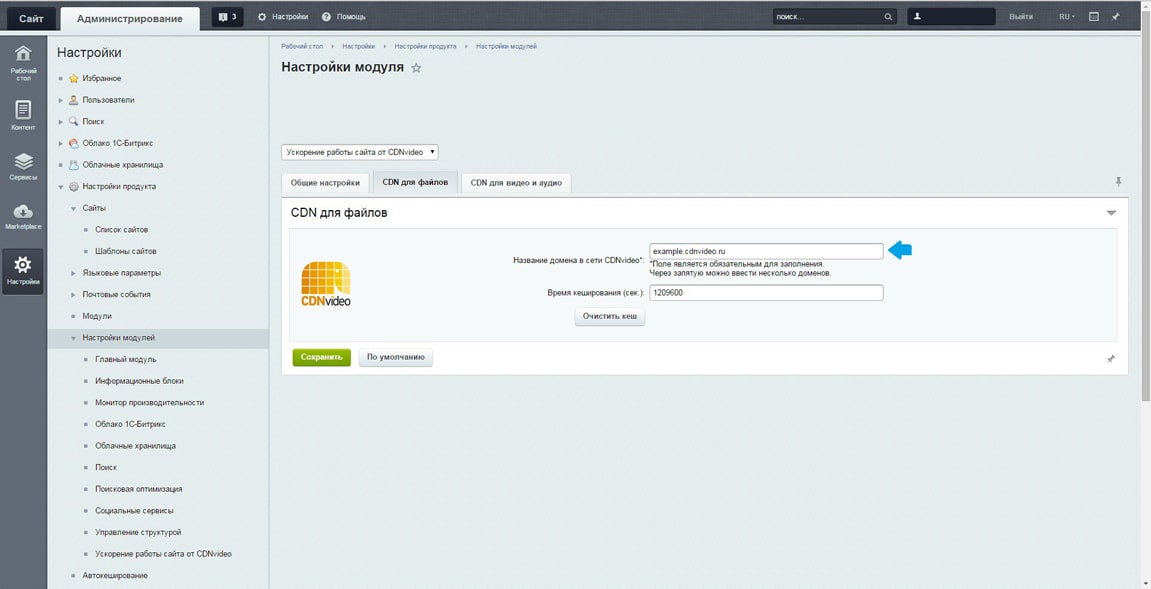
Enter the domain name to CDNvideo network (taken from the letter that you sent to our manager) and set the caching time (set in seconds, 2 weeks displayed by default).
- Click on the "Save" button.
- Congratulations! You are connected to the CDN.
- You can always clear the cache for a given section. Note that the cache is cleared only for selected domain. Total cash, for all domains can be reset in the "General Settings".

Step 5 (Optional). Caching heavy static files
-
Important!
You need a separate domain on CDNvideo network to work with this section. Refer to your manager or to technical support to figure this out. -
The “CDN for video and audio” section is for caching the files which exceed 1 MB. As a rule, these are the files with the following extensions:
- mp3
- mp4
- ogg
- flv
-
Open the section.
- Input the name of the domain on CDNvideo network.
- Click “Save”.
- You can clear the cache for a given section anytime. Note that the cache can be cleared only for selected domain. The shared cache, for all domains, can be reset in the "General Settings" section.

Step 6 (For experienced users).
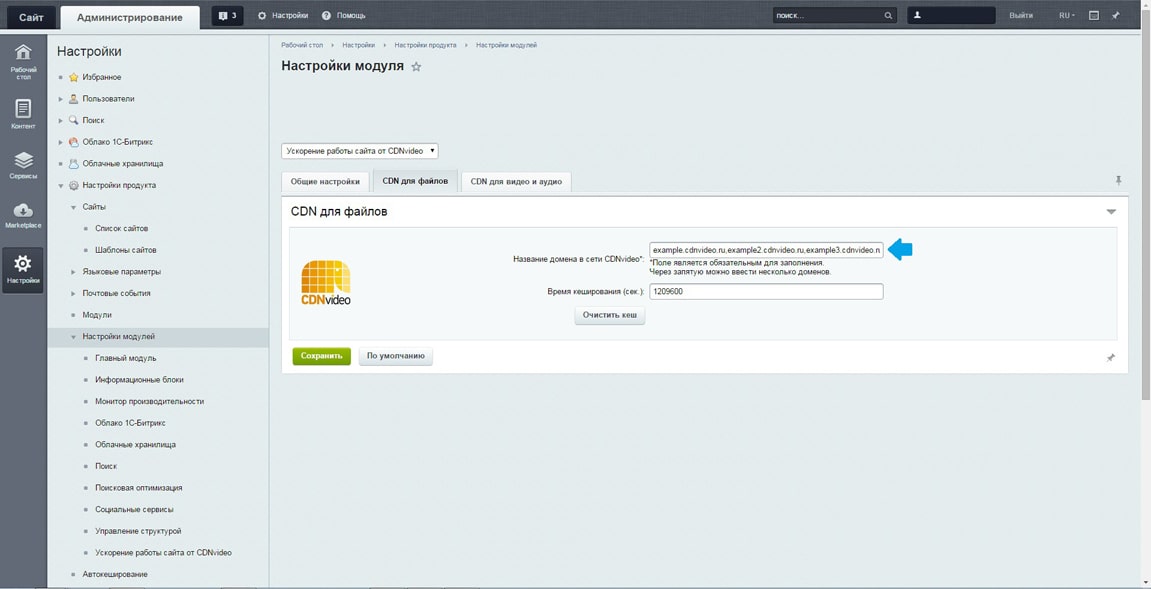
Browsers limit the number of concurrent downloads from a single domain. To work around this limitation, you can set up multiple CNAME and thus ensure a faster loading of your website. To activate this option you need:
- Contact your manager or our technical support and customize to your account multiple CNAME.
- Specify in the application all the selected domains, separated by commas, as shown in the figure.
- Do not forget to save your changes.
